Mega Ramp for Lucky Blocks How to Jump Farther on the Mega Ramp
Car upgrades, clean launch lines, and Landing Zone targeting for better Lucky Blocks.
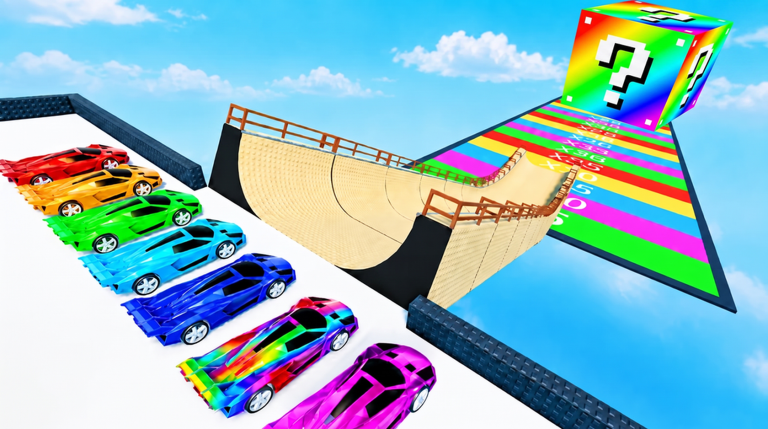
Distance is the skill expression of Mega Ramp for Lucky Blocks. Your car, your line down the Mega Ramp, and your landing discipline decide which Lucky Blocks you can reasonably expect. This guide focuses on jumping farther on purpose — not on fake telemetry tables or invented “perfect angle” degrees that the game never shows. Pair it with Getting Started if you still need the basic loop, and with How to Farm Money so longer jumps actually convert into Money/sec.
The embedded video tests Roblox mega-ramp style launches. Use it as a feel reference for how speed and commitment at the lip translate into airtime, then apply those instincts inside this Lucky Blocks experience.
Why distance matters
In the Mega Ramp formula:
- Farther landings generally unlock better Landing Zone opportunities.
- Better opportunities raise the chance of stronger units from Lucky Blocks.
- Stronger units raise Money/sec.
- Higher Money/sec funds the next car — which extends distance again.
You are building a flywheel. Skipping distance practice and only upgrading random units will eventually soft-lock you behind a car wall. Skipping cars and only praying for RNG has the same problem. Jump farther and farm smarter.
Exact band meters and drop percentages are often hidden. Treat “farther than last car on average” as your north star.
Car first: the biggest legal distance lever
Cars are the primary progression item for launch power. Practical rules:
- Prove the upgrade — After buying a car, run at least three serious jumps. If average distance does not improve, rethink spending priority.
- Do not impulse-buy every tier — Mid-tier vehicles that look flashy may underperform a cheaper car that fits your current Money curve. Compare on the Tier List Hub as rankings appear.
- Bank deliberately — When you decide the next car is the bottleneck, stop dumping coins into tiny unit upgrades that do not change Money/sec much.
- Relearn the line — A faster car exaggerates mistakes. Recenter your approach after every vehicle swap.
If a shop lists stats, use them. If it does not, empirical testing beats rumor spreadsheets.
Mega Ramp line: clean speed over fancy steering
Most lost distance comes from scrubbing speed before the lip.
Approach
- Enter the Mega Ramp centered. Wall taps bleed momentum.
- Avoid late swerves. Small corrections early beat panic steering at the end.
- Keep throttle commitment appropriate for your car — many launches want maximum speed through the exit.
Lip and launch
- Treat the end of the ramp as a runway threshold. Braking “to aim” usually shortens the jump more than it helps.
- Hold a stable camera so you can see the Landing Zone target early.
- Accept that perfect cinematic flips are not the goal; reachable collectible landings are.
In the air
- Minor air control may exist depending on the vehicle physics. Use it to stay above the Landing Zone rather than overshooting into a dead zone if one exists.
- If you consistently fly past usable collection areas, you are overshooting — aim for the farthest productive band, not infinite airtime.
Landing and collect
- Touch down, then finish the Lucky Block interaction before celebrating.
- Reset to the ramp quickly. Distance practice is a volume sport: ten clean attempts teach more than one viral clip attempt.
Consistency beats highlight-reel RNG
Track your “typical” landing, not your best landing. A car that lands in a strong band eight times out of ten is worth more than a glass cannon line that nails a miracle once and crashes four times. Consistency feeds both Money farming and Rare Lucky Blocks hunting because you generate more rolls per hour.
Mini drill (five minutes)
- Mark a visual landmark in the Landing Zone as your target.
- Take five jumps focusing only on a straight Mega Ramp line.
- Ignore upgrades during the drill.
- Note how many times you hit the target band and successfully collect.
- Adjust centering; repeat.
When the hit rate rises, spend Money. When it stagnates, you need a better car or a calmer approach — not more chaotic steering.
Device and server tips
- Mobile versus desktop — Use whichever control scheme lets you hold a straight line. Precision matters more than raw DPI.
- Five-player servers — Watch stronger players’ lines without crowding. Copy their approach path, not just their car skin.
- Lag — If the ramp feels desynced, delay big car purchases until input feels trustworthy; physics-sensitive launches punish packet loss.
Upgrade priorities while chasing distance
Distance and economy must stay linked:
| Priority | When |
|---|---|
| Fill base slots | Always first |
| Cheap upgrades on top earners | While saving for a car |
| Next meaningful car | When bands plateau |
| Rare hunting sessions | After distance is stable |
Dumping every coin into cars while your base is half empty slows you down. Dumping every coin into weak units while your car cannot reach rare bands also slows you down. Alternate using the Money guide’s session structure.
What we will not invent
- Exact degree angles labeled as “official.”
- Fake speed stats for unpublished cars.
- Guaranteed rare drop distances presented as datamined truth without a source.
- Patch dates for launches we have not verified — see Updates instead.
Practical observation beats fabricated precision.
Troubleshooting short jumps
Symptom: car feels slow on the ramp
Check that you are not braking, scraping walls, or using an outdated vehicle. Re-buy or re-equip the intended car.
Symptom: long airtime but no Lucky Block
You may be missing the collectible Landing Zone. Shorten the line slightly to prioritize collection.
Symptom: new car feels worse
Give it three to five sober attempts. If still worse, your Money may have been better spent on units — review How to Farm Money.
Symptom: progress stalled for days
Combine a car save with Index-aware rare hunting from Rare Lucky Blocks, and verify no new progression systems were added on Updates.
After you can jump farther
Longer jumps are a tool, not the endgame. Convert distance into:
- Higher-quality Lucky Block units in your base.
- Index completions for collection prestige.
- Faster Money/sec that funds the next vehicle tier.
Return to the Guides Hub when you need a different bottleneck guide. Check Codes for free boosts when available, Players for community launch habits, and Scripts only for safety-aware tooling discussion.
Master a straight Mega Ramp line, buy cars that prove themselves in average distance, and land where Lucky Blocks can actually be collected. Do that on loop and Mega Ramp for Lucky Blocks opens up — farther, richer, and ready for Index hunting.
Frequently Asked Questions
Quick answers for Mega Ramp for Lucky Blocks players.
What helps most when trying to jump farther?
A better car plus a clean, centered Mega Ramp line. Prove each car with several jumps before spending further.
Should I brake at the end of the ramp to aim?
Usually no. Braking at the lip often costs more distance than it gains. Commit speed and aim with your approach path instead.
Why do I fly far but get nothing?
You may be missing the Landing Zone collect step or overshooting usable reward areas. Prioritize productive landings you can collect every time.
How many test jumps should I do after buying a car?
At least three serious attempts — preferably five — so you judge average distance, not a single lucky flight.
Does this guide list exact official drop distances?
No. Exact meters and rates are often unpublished. Use relative improvement and consistent Landing Zone bands instead.
What should I read if money is the real bottleneck?
Use How to Farm Money to raise Money/sec, then return here when you can afford the next meaningful car.